STEP 1: Open Task Manager

- Right-click anywhere on the Task bar
- Click on Start Task Manager
STEP 2: In Processes, End SurfEasy
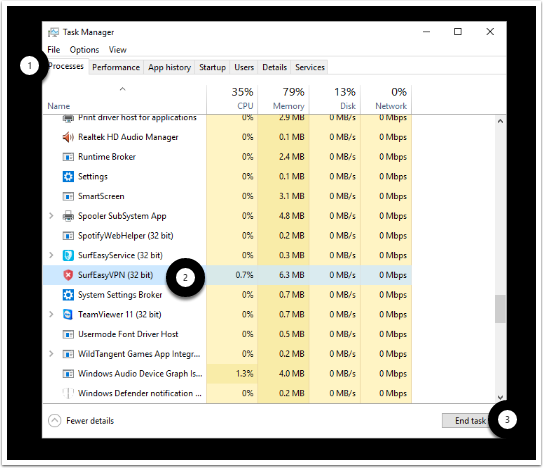
- Click on the Processes Tab. Windows 8 users click on More Details.
- Click once on the SurfEasyVPN.exe
- Click on End Process. Windows 8 users click on End Task.
STEP 3: Open Internet Explorer
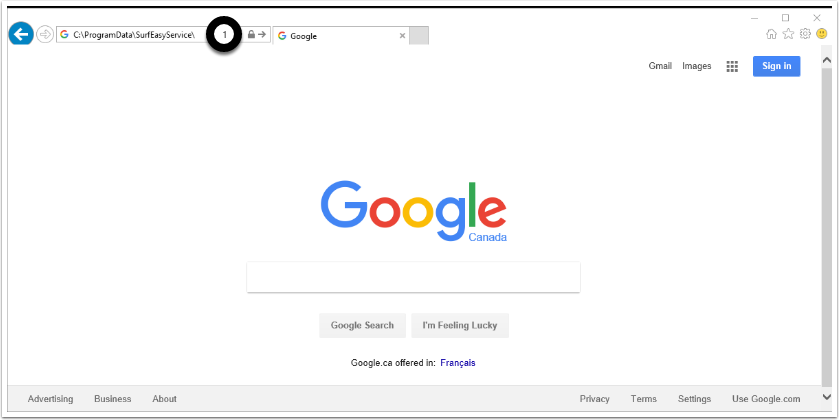
In Internet Explorer (not Chrome or Firefox) enter the following directory address and then hit enter. Alternatively you can access the file location using the File Explorer
C:\ProgramData\SurfEasyService\
STEP 4: Delete the file account_info.se
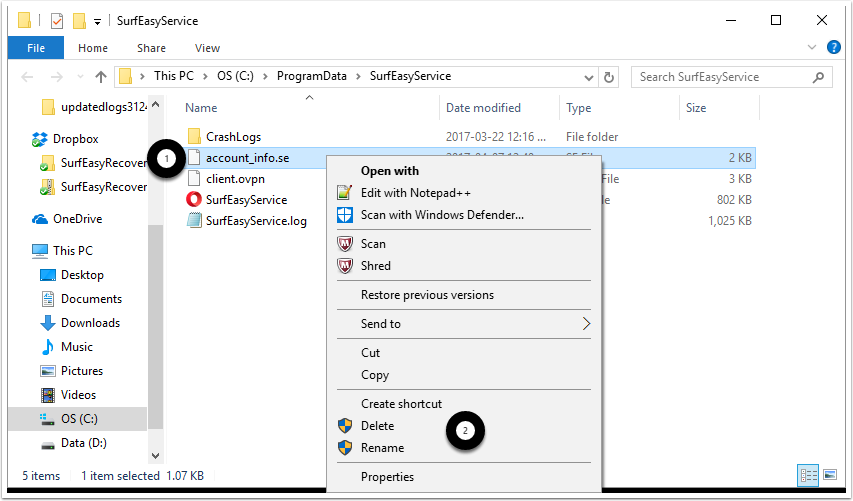
- Right-click the file account_info.se it may also just be called account_info
- Click on Delete
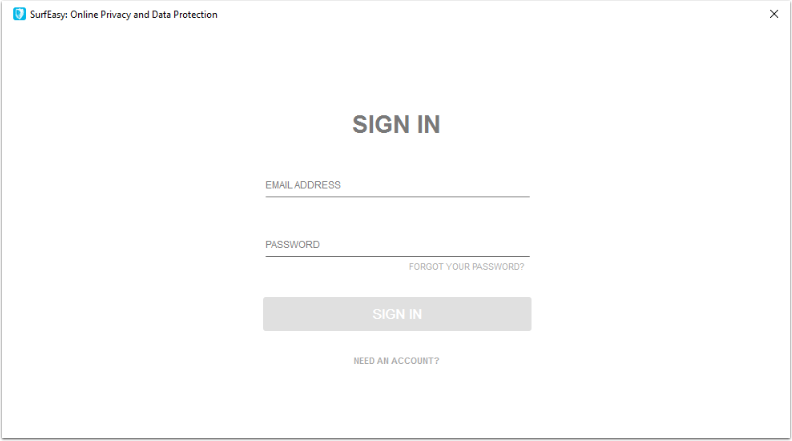
STEP 5: Double-click on the SurfEasy desktop shortcut and Sign In again
Comments
0 comments
Please sign in to leave a comment.