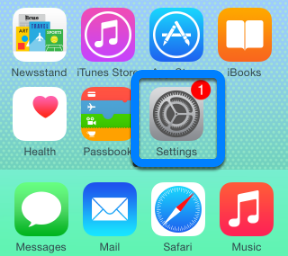
STEP 1: Tap and open "Settings"
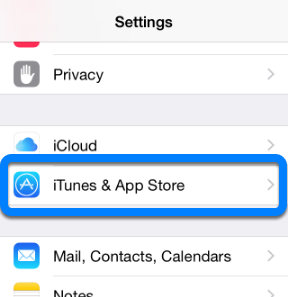
STEP 2: Scroll down and tap "iTunes & App Store"
STEP 3: Tap on "Apple ID"
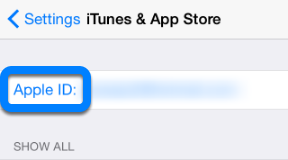
If you don't see your Apple ID, tap Sign In and enter your information. Then tap your Apple ID.
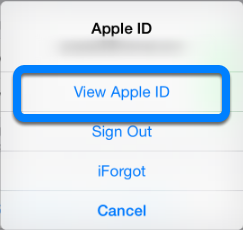
STEP 4: Tap on "View Apple ID"
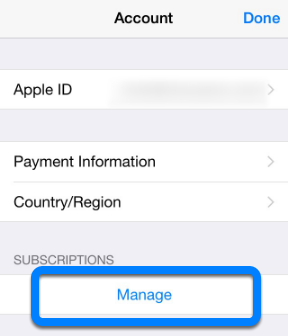
STEP 5: Tap on "Manage"
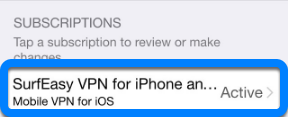
STEP 6: Tap on "SurfEasy VPN for iPhone and iPad"
STEP 7: Tap on the 1 month or 1 year

Whichever plan you were using or wish to use, to accept the new charges.
Comments
0 comments
Please sign in to leave a comment.